Assets
Process Objective#
You can create new assets, manage your assets records and checkin/checkout your asset.
Overview#
Assets are items tracked by serial number or asset tag. They tend to be higher value items where identifying a specific item matters. In this feature, you can manage all asset databases easily, including checkin/checkout.
Features and Functionality#
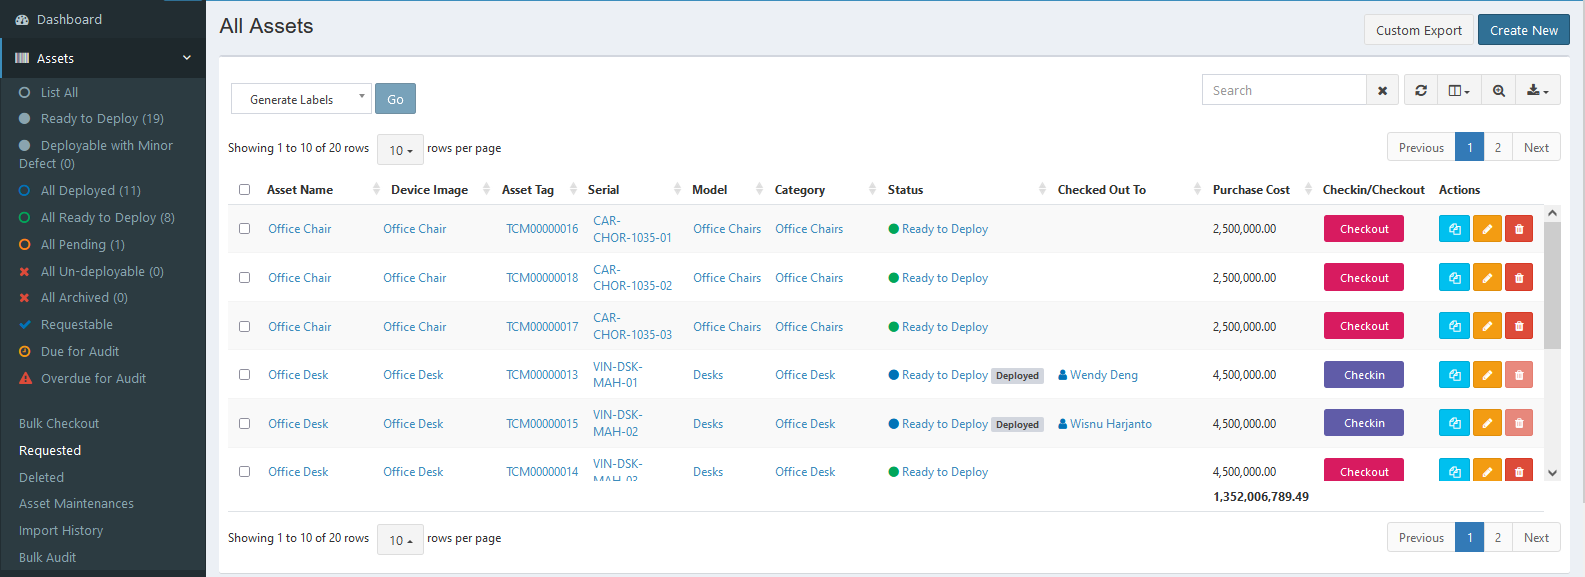
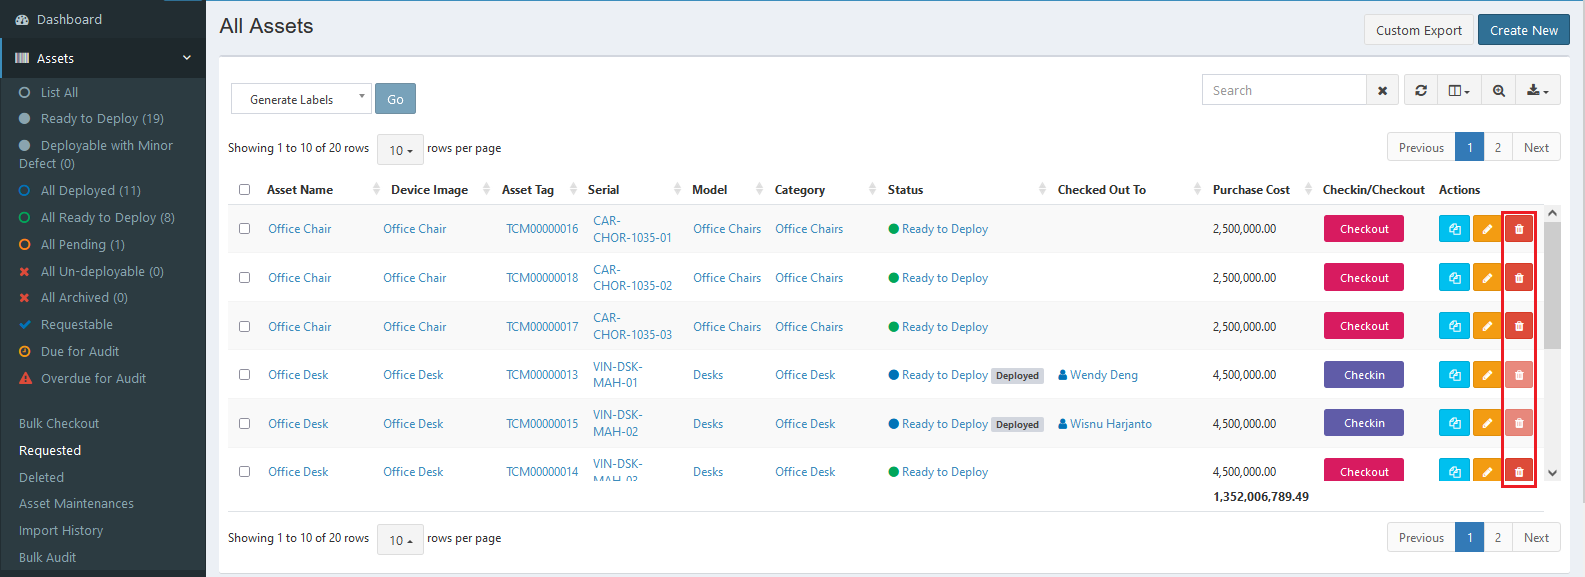
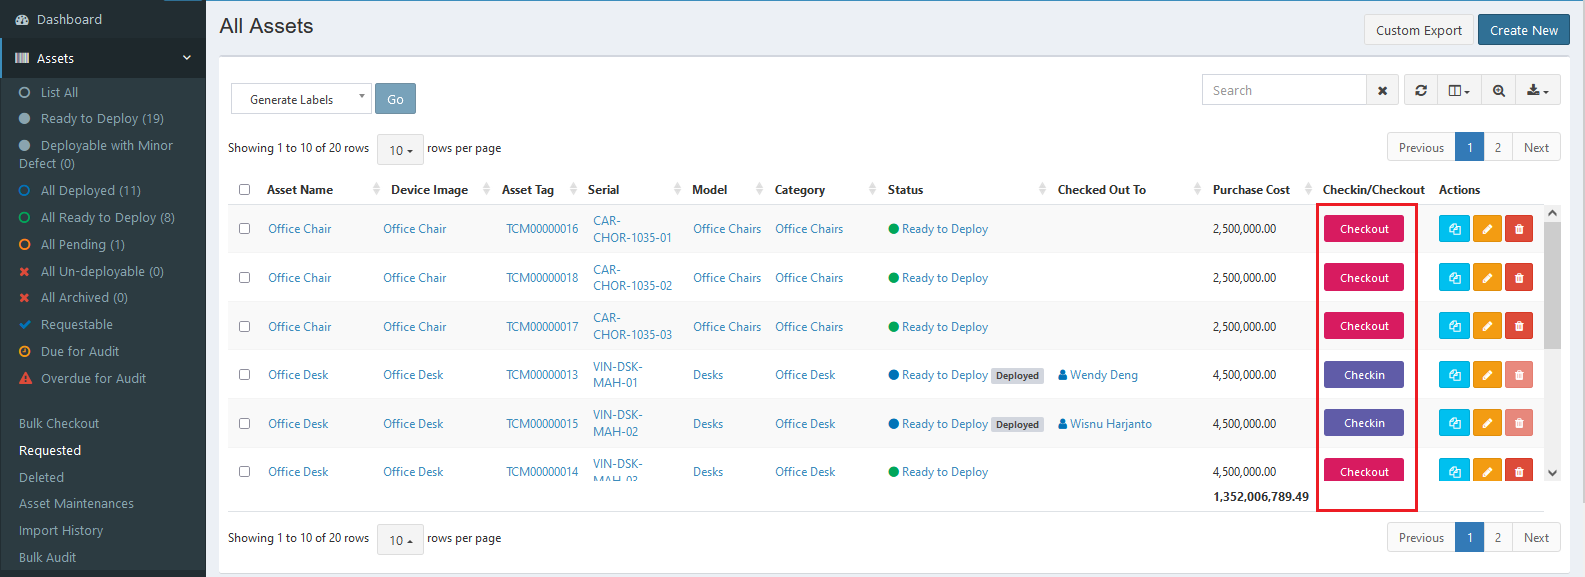
Here is the Assets interface:
View Assets#
You can access the complete information of an asset and many features in it.
STEPS
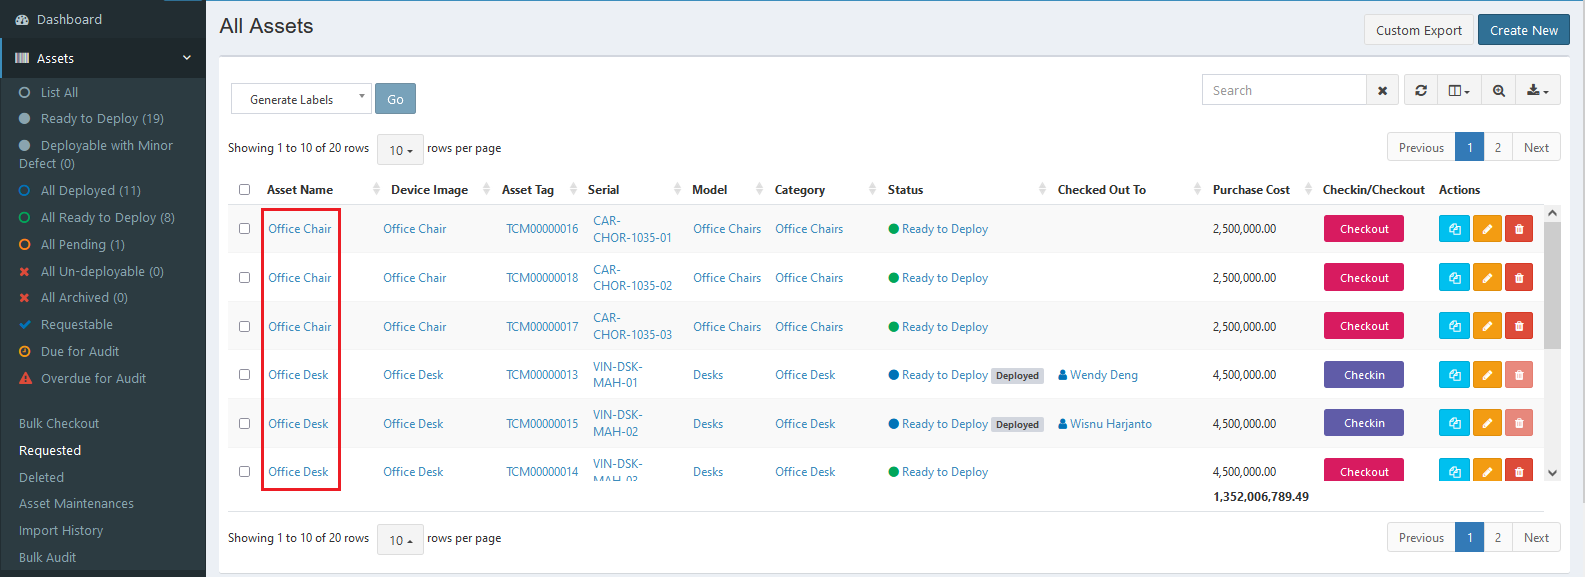
- Click any asset name in asset name column.
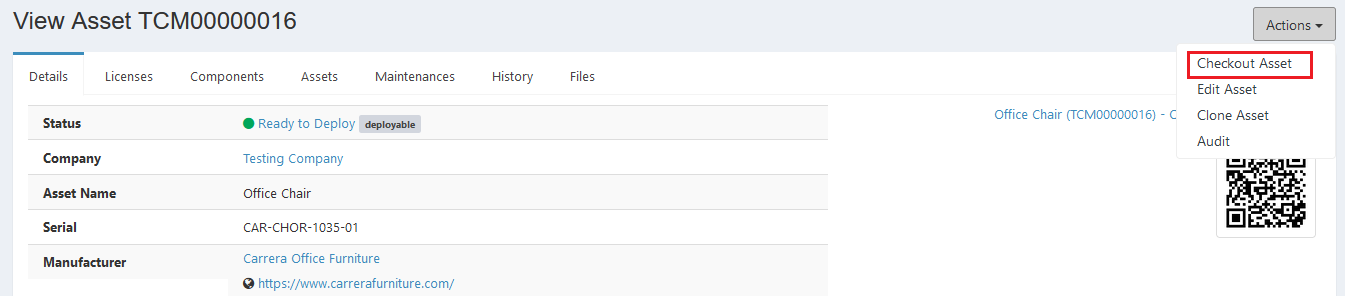
Here is the View Asset interface:
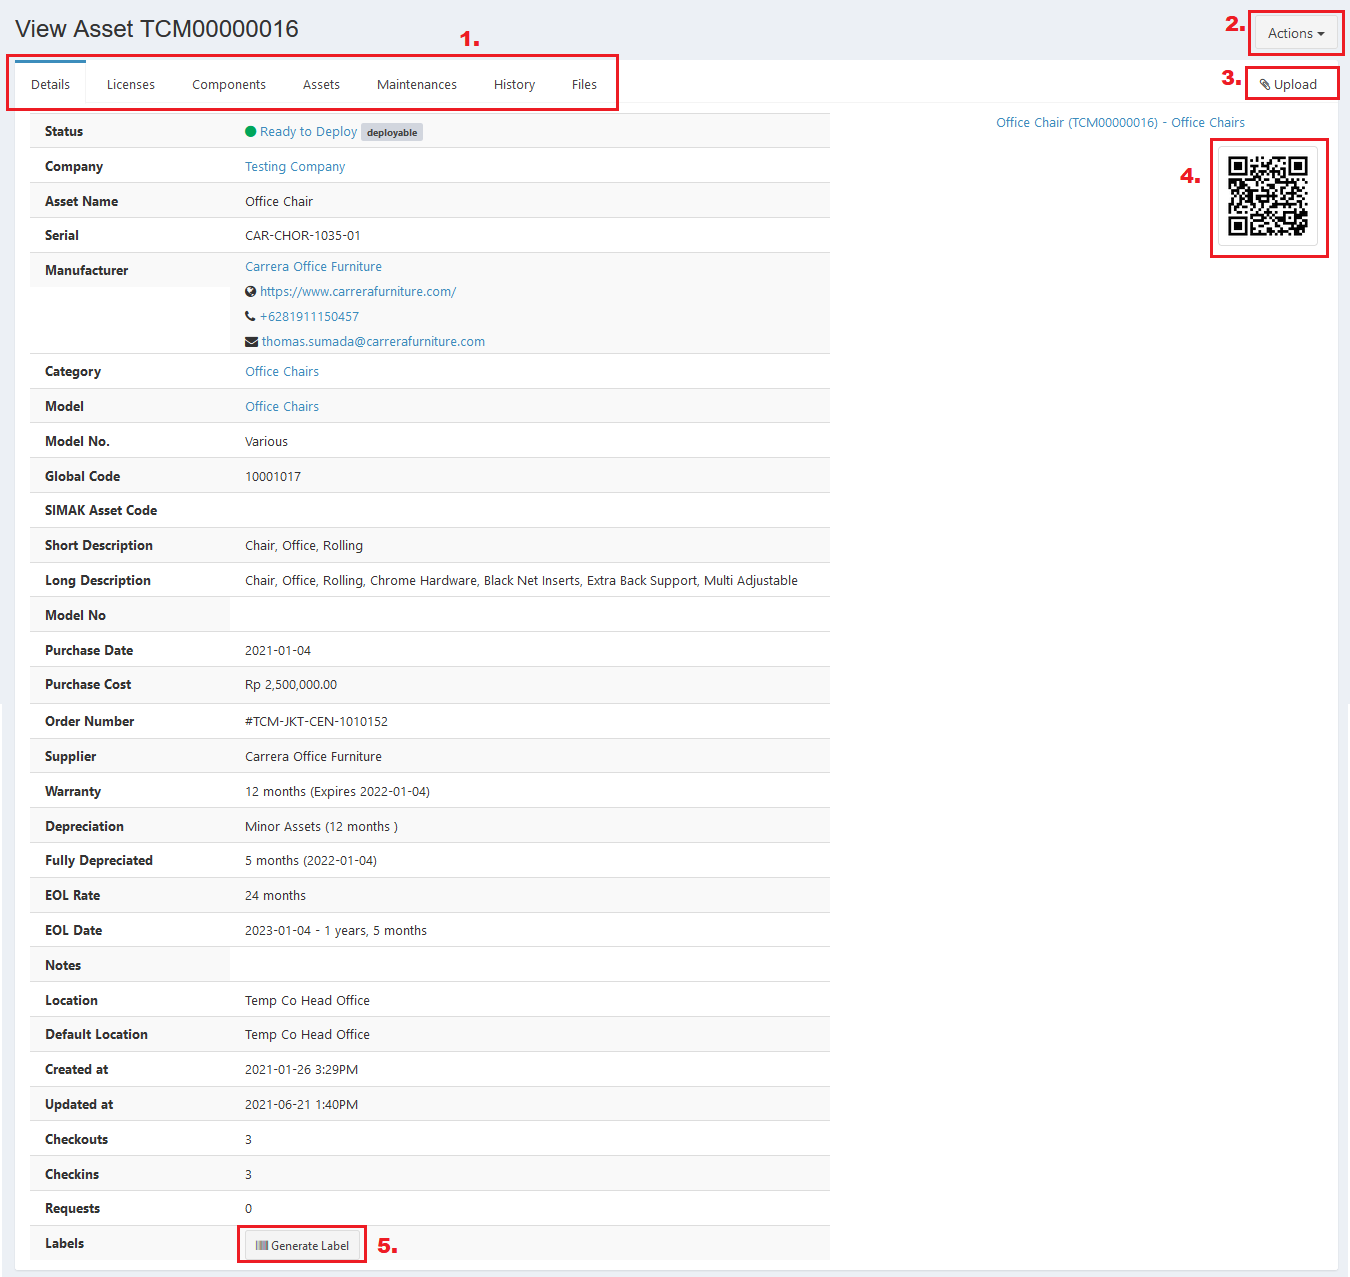
- View asset tabs, click any tabs to see all information within.
- Action tabs click it to acces any action you can do to asset.
- Upload image tab, click it to upload your asset image
- Asset barcode, it will lead you directly to view asset page.
- Generate Label button, click it to generate your asset label. Here is the example of generated label:

You can print it from your browser.
Create New Assets#
You can create new asset.
STEPS
- Press the Create New button on the top right corner of the tab.
Here is the Create Asset interface:
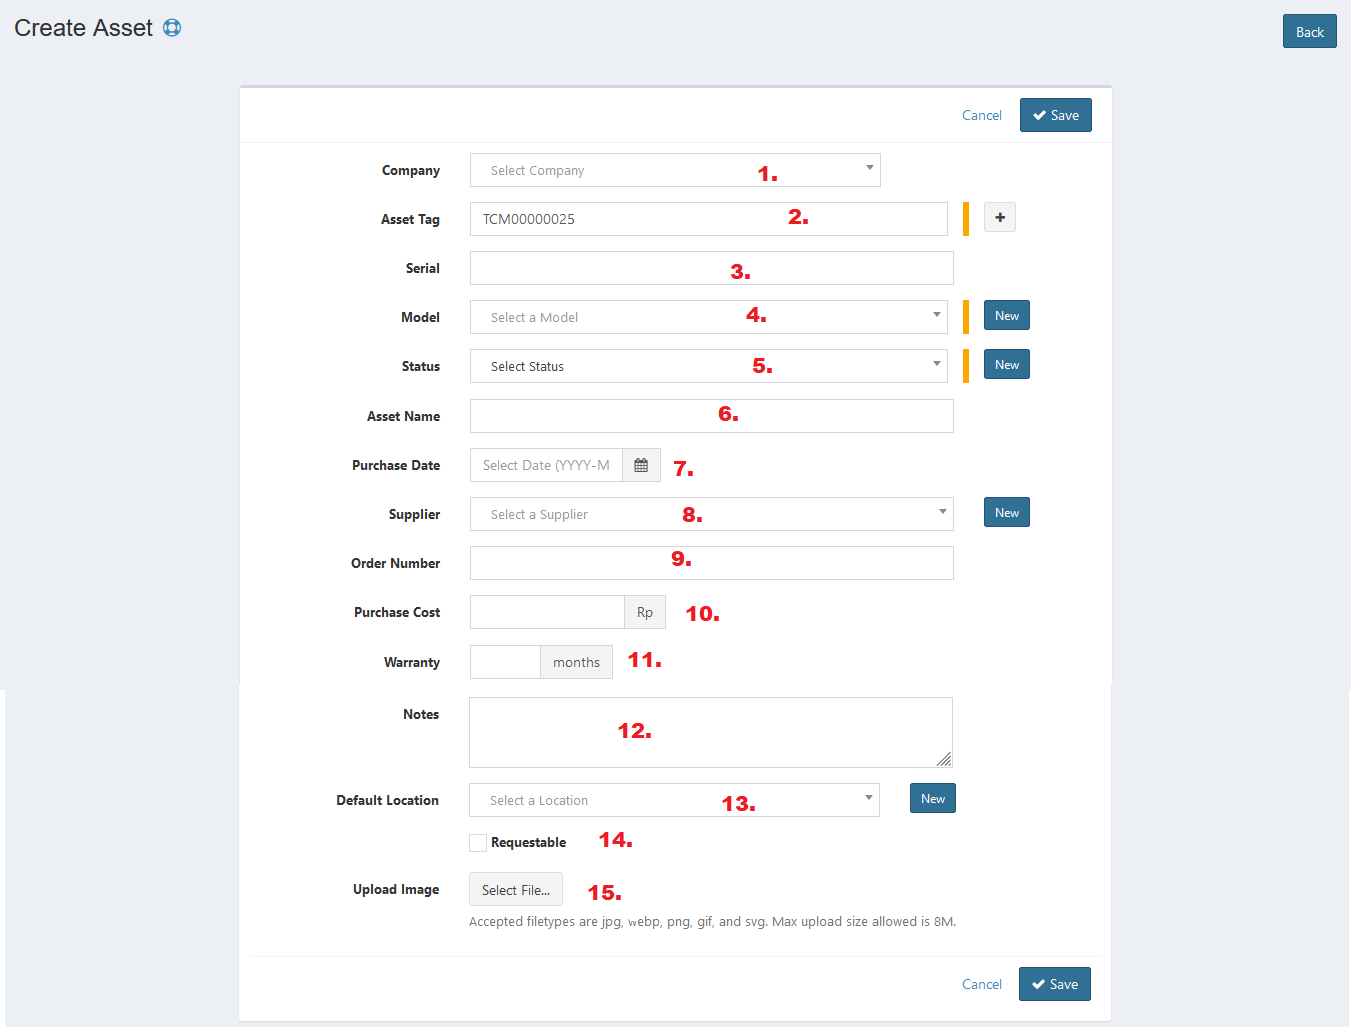
- Select company.
- Enter asset tag. This will be used as the title in view asset page
- Enter serial.
- Select model. You can also add new model by clicking the New button beside the field.
- Select status. You can also add new status by clicking the New button beside the field.
- Enter asset name.
- Enter purchase date.
- Select supllier. You can also add new supplier by clicking the New button beside the field.
- Enter order number.
- Enter purchase cost.
- Enter warranty.
- Enter notes.
- Select location.
- Check the requestable checkbox if you want to allow user to request the asset.
- Upload image. Click the Select Image button, then select the images you want to upload from your local. See the instruction before uploading.
- Click Save button to finish your record.
- Click Cancel button to cancel your record.
- Click Back button to go back to the previous page.
Update Assets#
You can update your assets record by clicking the update button in action column. The steps are the same with create new asset.

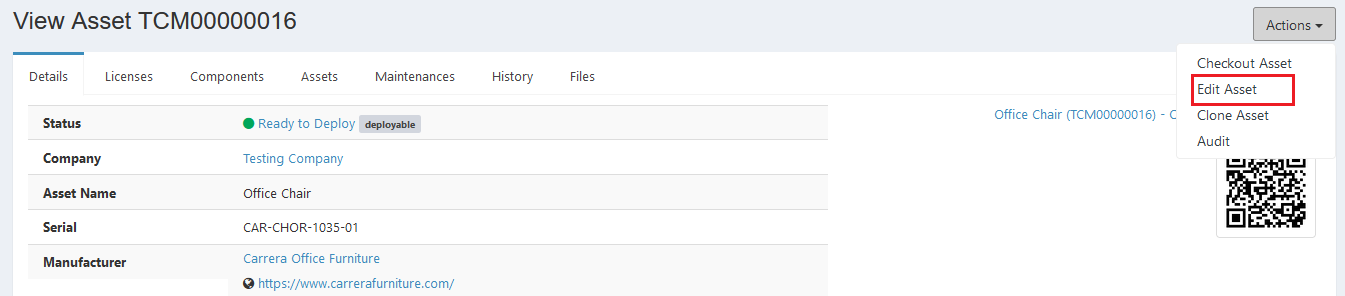
You can also edit your asset record from the view asset page. Click the Actions button on the top right, and select Edit Asset. It will lead you to the update asset page.
Export#
You can export assets records to CSV, MS-Excel, MS-Word, TXT, JSON, XML, and PDF by clicking the export icon, then select export format.

Custom Export#
You can customize your asset report. Click the Custom Export button on the left of Create New button. Select the fields you'd like to include in your custom report, and click Generate. The file (custom-asset-report-YYYY-mm-dd.csv) will download automatically, and you can open it in Excel.

Set Column to Display#
There are 32 columns in assets tab. You can select what columns to display here by clicking the column icon, then checklist the columns.
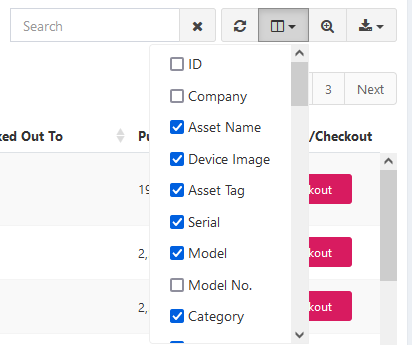
There can be additional columns in asset according to the fieldset you use in certain asset. Here are the example of additional columns:

Refresh#
Click the refresh icon, and your record will be refreshed.

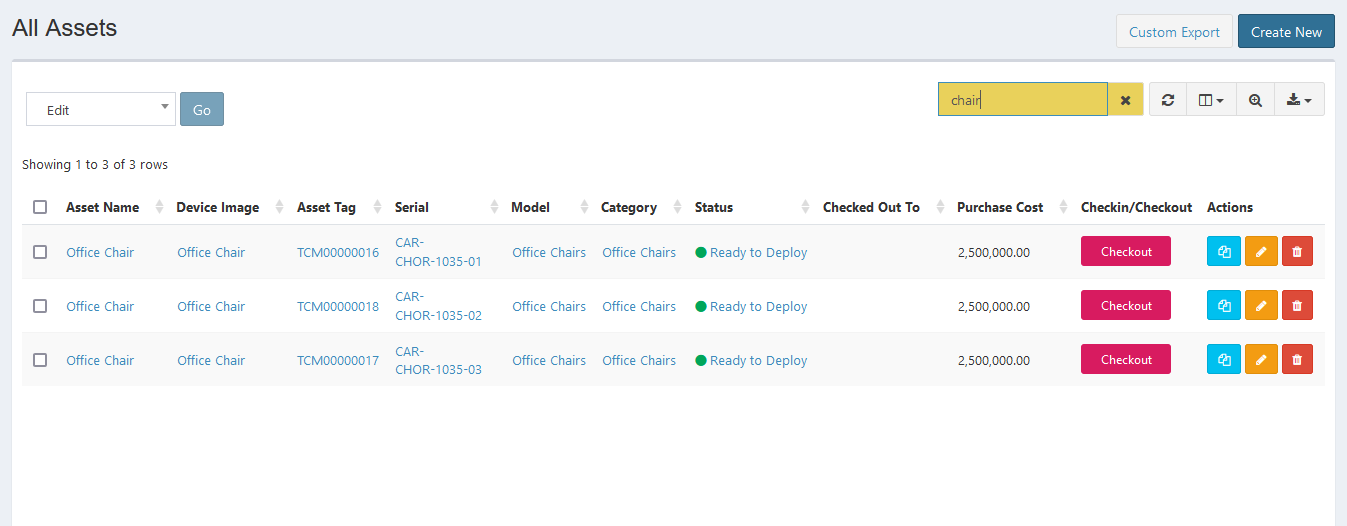
Search Assets#
You can search your assets record by typing in search field beside refresh icon. The system will automatically show the result. Click the close icon next to search field to cancel your search.
Advanced Search Assets#
You can also search your asset specifically in advanced search feature.
STEPS
- Click the advanced search icon on the right of refresh button, and this box will appear:
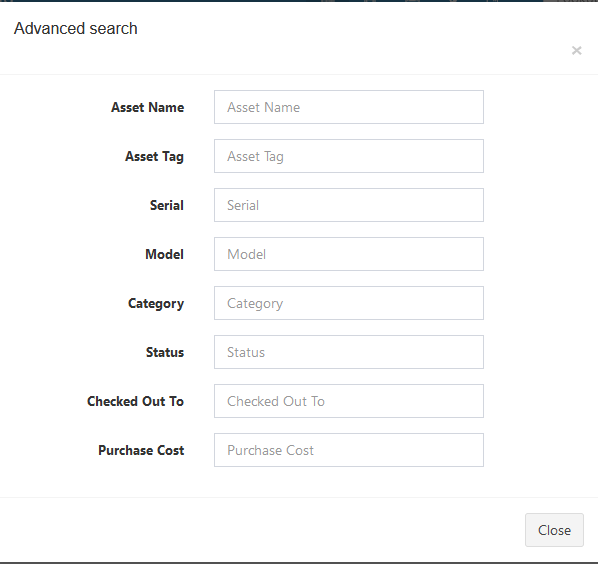
- Fill in any fields you want to use as a key for your search then click the Close button.
Delete Assets#
You can delete asset record by simply clicking the delete icon in action column.
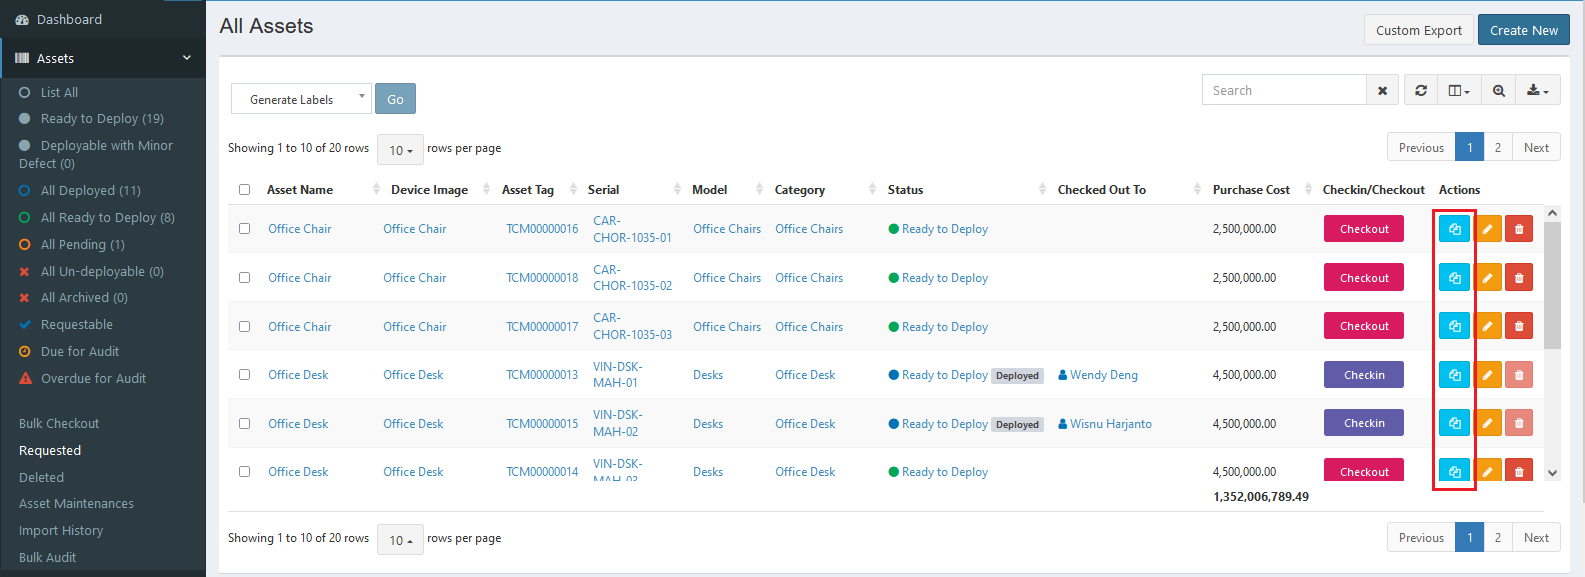
Clone Assets#
You can create new asset by simply cloning all the records from existing asset and give a little changes (especially the asset model tag or name). Click the clone icon in action column, and the steps will be similiar with create or edit asset models.
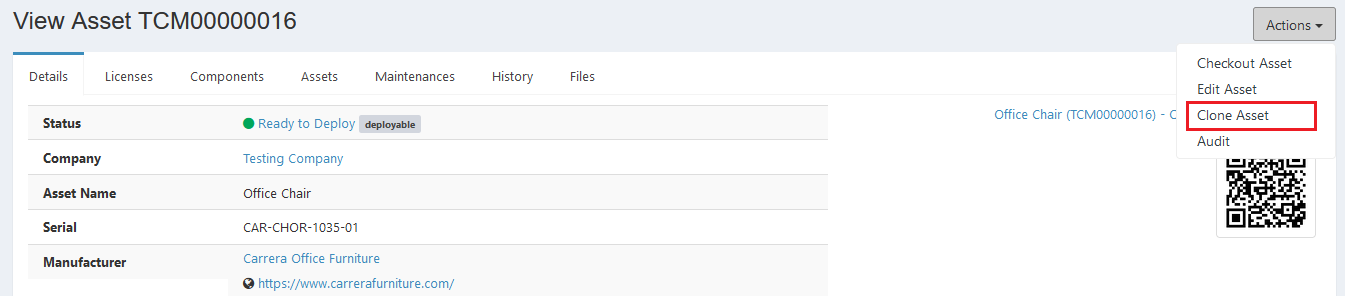
You can also clone your asset record from the view asset page. Click the Actions button on the top right, and select Clone Asset. It will lead you to the clone asset page.
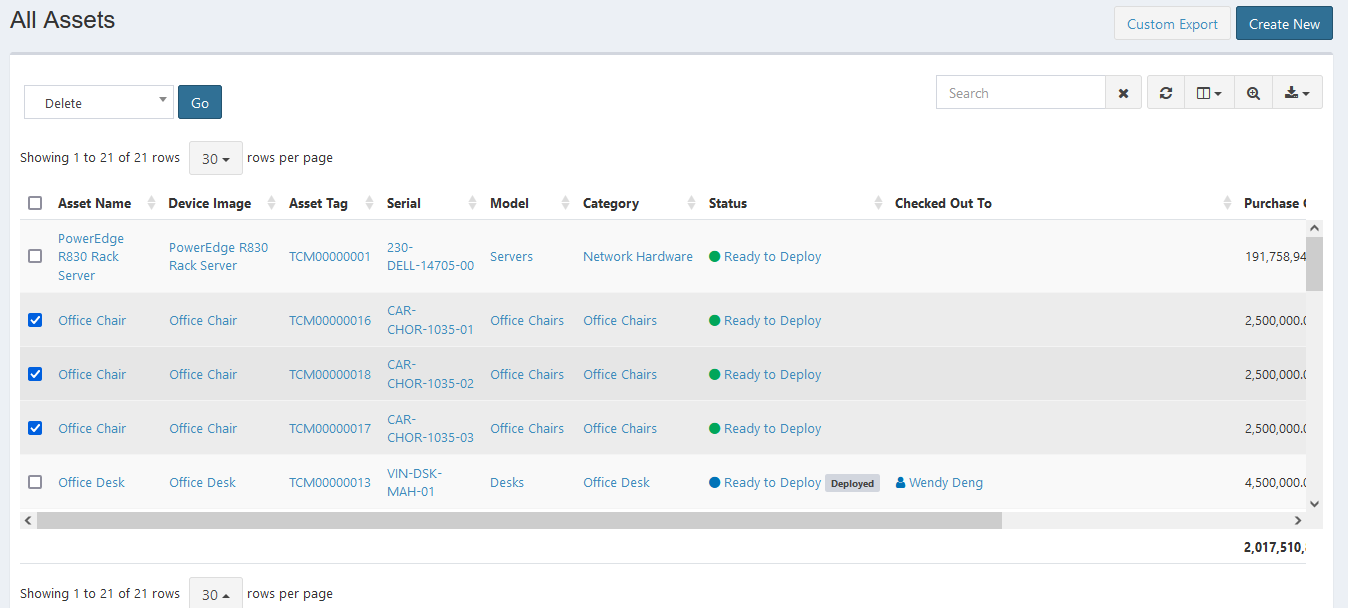
Bulk Edit#
You can edit multiple asset records at the same time.
STEPS
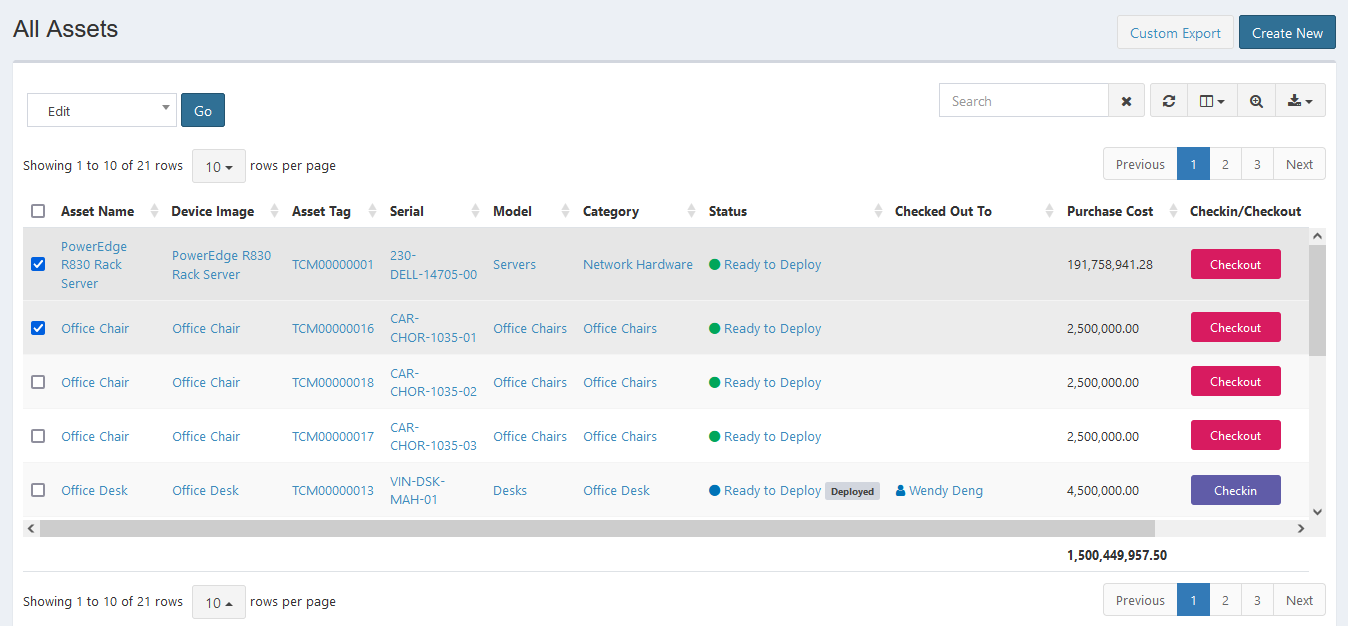
- Check the checkboxes of the records you want to edit.
- Check the very top checkboxes to select all records.
- Click Go button and the bulk edit page will appear.
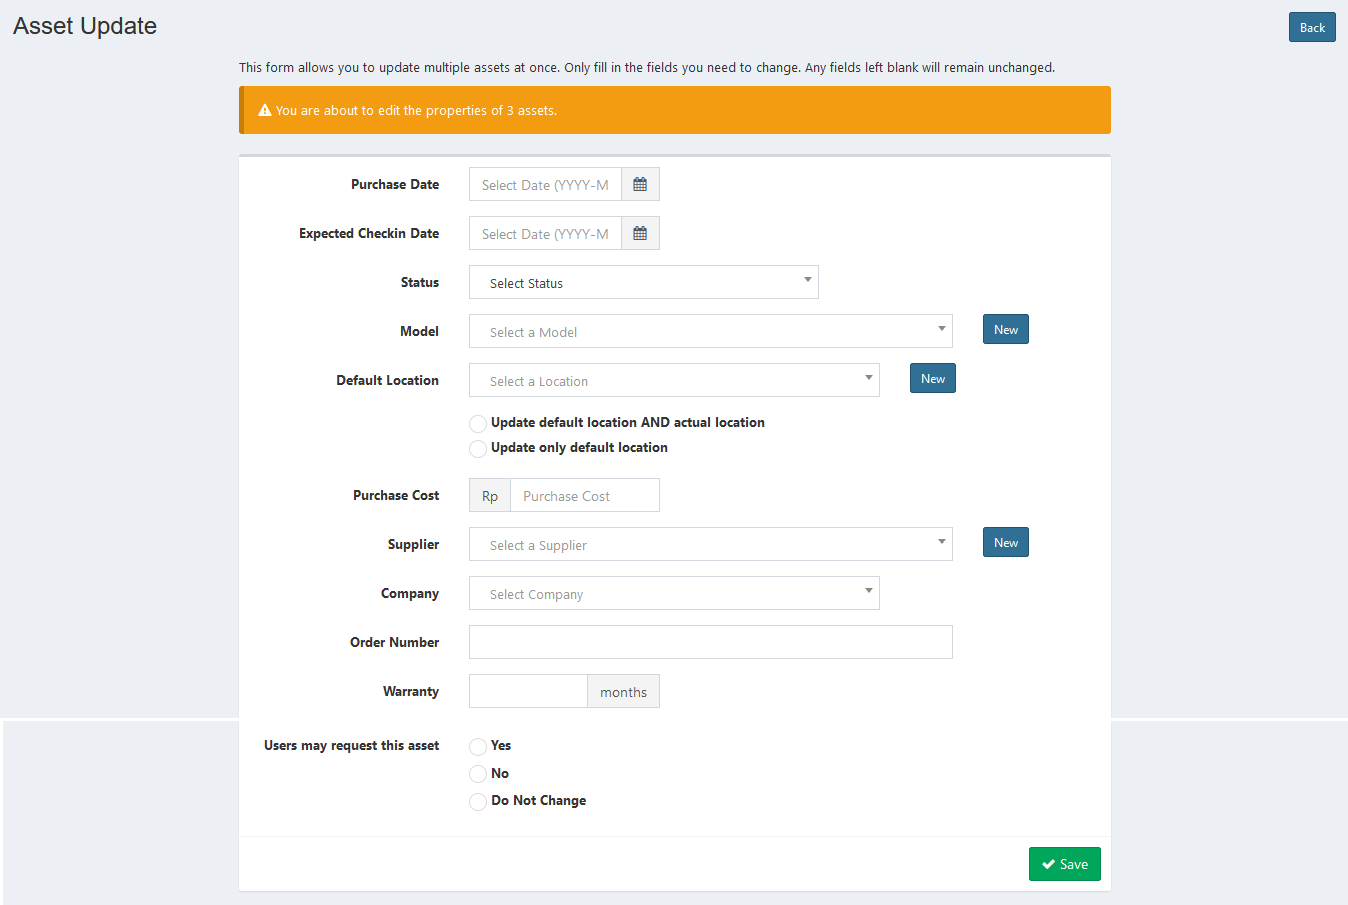
Edit any field, make sure to read the instruction above then click Save button. The Changes will be applied in every checked asset model.
Bulk Delete#
You can edit multiple asset records at the same time.
STEPS

- Check the checkboxes of the records you want to delete.
- Check the very top checkboxes to select all records.
- Click Go button and the bulk delete page will appear.
Read the instruction above for clear instruction, then click Delete button. All checked assets models will be deleted.
Generate Labels#
You can generate multiple labels at the same time.
STEPS
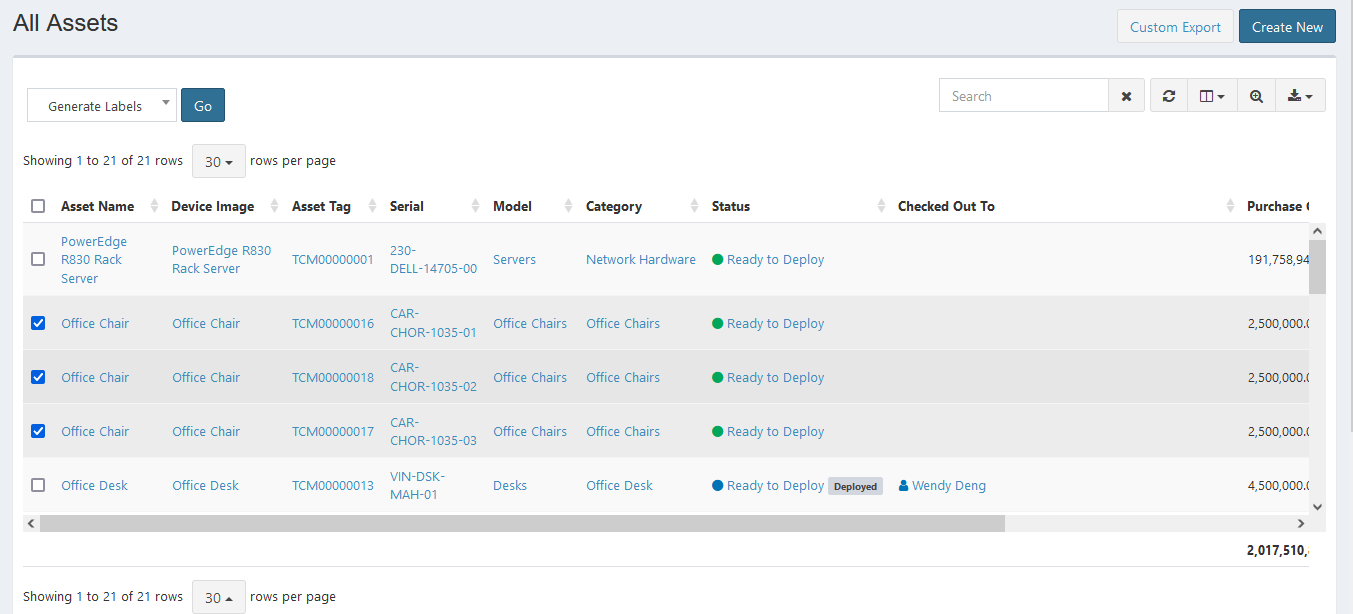
- Check the checkboxes of the records you want to generate its label.
- Check the very top checkboxes to select all records.
- Click Go button and the generated labels will appear.
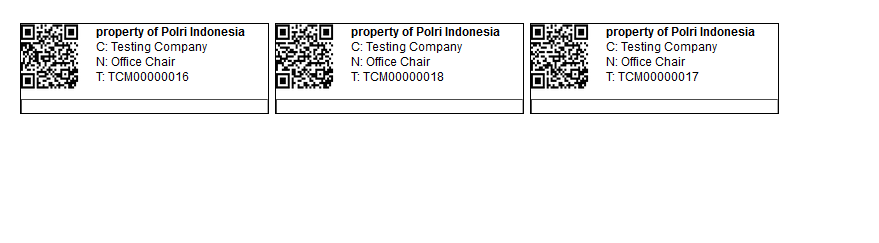
You can print it from your browser.
Checkin/Checkout Assets#
Checking in and checking out are two primary concepts within ProTag. When you checkout an asset, license or accessory, you’re marking them as being in the possession of someone else. This means that they cannot subsequently be checked out to another person until they are checked back in. This prevents “double-booking” assets, where one asset has been promised to or assigned to multiple people.
When an employee leaves your company, or if an asset, license or accessory is not functioning properly, you would check it back in. Checking it back in indicates that it’s back in your possession, or potentially out for repair. It’s up to you to decide what status to assign it, based on the condition of the asset.
STEPS
Checkout
- Click the Checkout button in its column.
You can also checkout asset from the view asset page. Click the Actions button on the top right, and select Checkout Asset.
Here is the Checkout Asset interface:
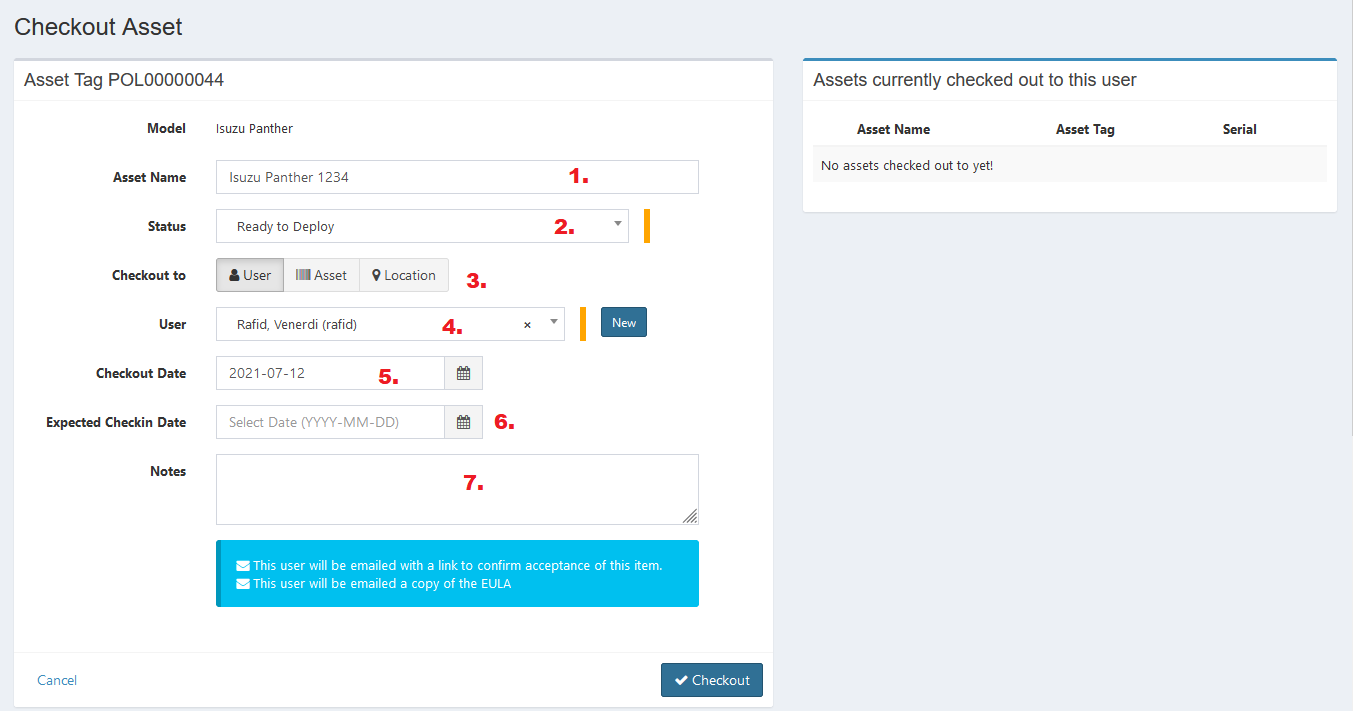
- Enter asset name, you can enter a new name or use the current one.
- Select status.
- Decide to what you checkout your asset to.
- Select the user/asset/location.
- Set checkout date.
- Set expected checkin date, you can skip this
- Enter notes if needed.
- Click Checkout button to finish.
- Click Cancel button to cancel checkout.
Checkin
- Click the Checkin button in its column.
You can also checkin asset from the view asset page. Click the Actions button on the top right, and select Checkin Asset.
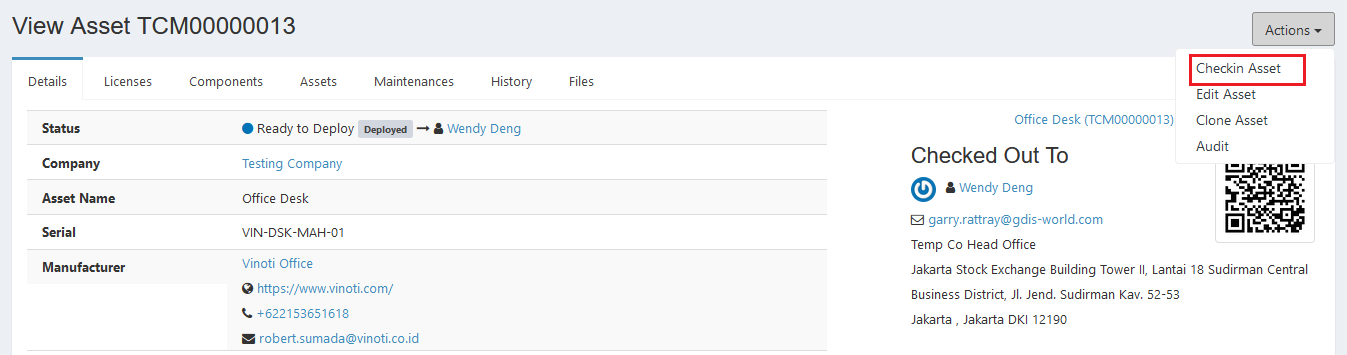
Here is the Checkin Asset interface:

- Enter asset name, you can enter a new name or use the current one.
- Select status.
- Select location.
- Set checkin date.
- Enter notes if needed.
- Click Checkin button to finish.
- Click Cancel button to cancel checkin.
Error Message#
- This is required field.

To save the record, you must fill the required field.
- Accepted filetypes are jpg, webp, png, gif, and svg. Max upload size allowed is 8M. Upload is file size MB.

Your uploaded image is too large. Upload image with 8 MB size or below.
Confirmation Messages#
- Are you sure you wish to delete Asset Name?

This confirmation message will appear when you click the delete button. Click Yes button to continue or click Cancel button to cancel.